

How To Measure Trim For Windows
How to Install Window Trim
Y'all don't even need a tape mensurate for perfect window casings!
Introduction
Most trim carpenters don't fifty-fifty use a tape to trim windows. It'south all done by center, with a sharp pencil, a miter saw and an 18-gauge nailer. Here's how they do it.
Tools Required
Materials Required
- Actress pencils
- Trim
- Forest glue
- Forest shims
Avoiding Trim-induced Headaches When Installing Window Casings
Here are a few tips to aid y'all avoid a few trim hassles when installing window casings:
- Whenever you can, cut with the thick side of the trim against the miter saw debate. Y'all'll be less probable to tear out the narrow tapered edge that mode.
- Cutting right up to the pencil mark almost always leaves pieces too long, so remove the pencil line with the blade. You'll most likely nevertheless take to shave off more.
- Sneak up on cuts by starting long and dipping the saw blade into the wood while you piece of work your way to the cutoff marker.
- Trim out the biggest windows first. That way, you can reuse miscuts for the smaller windows and not run out of material.
- When nailing 3/4-in.-thick trim, use 15-judge two-1/2-in. nails for the framing and eighteen-judge 2-in. brads for nailing to the jamb.
- To preclude splitting, avert nailing closer than two in. from the ends.
Project stride-by-footstep (11)
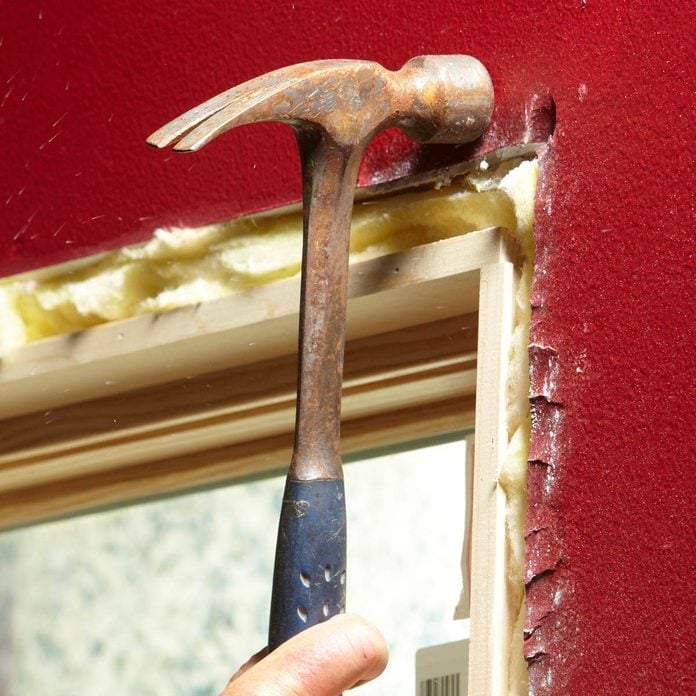
Footstep i
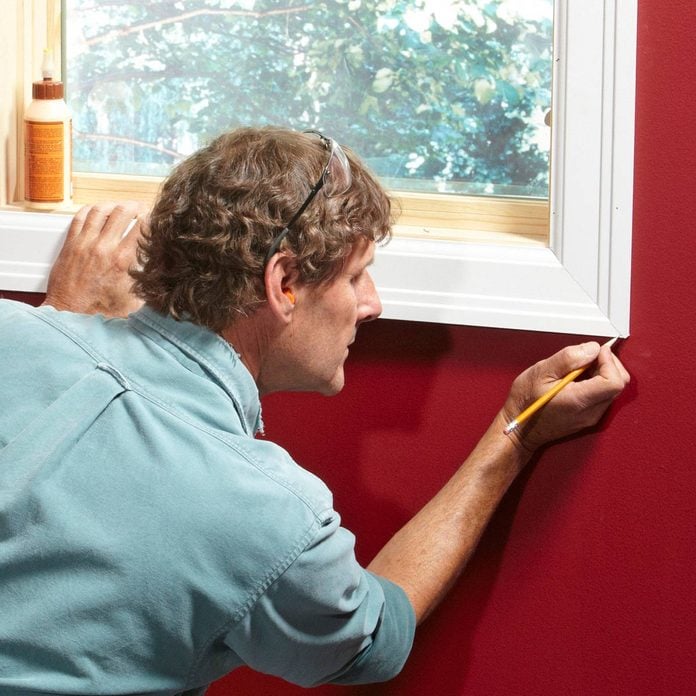
Marker the Length
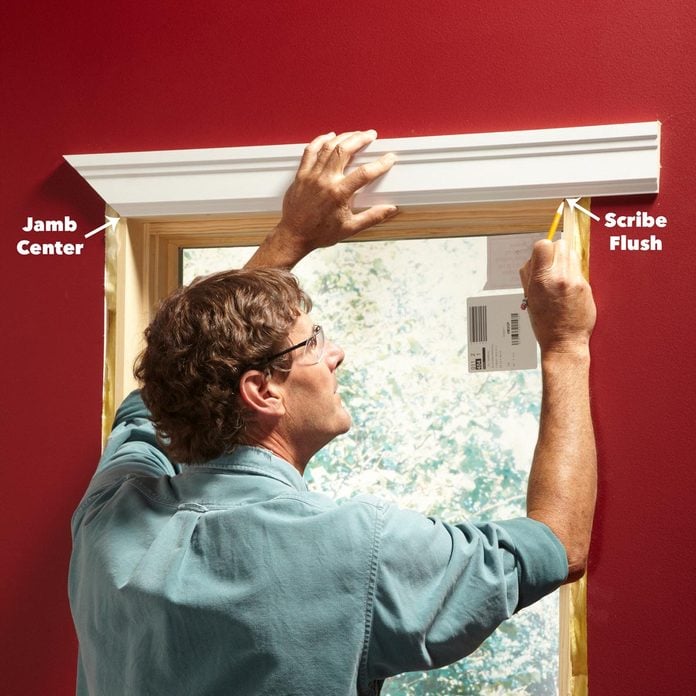
When installing window molding, start at the top. Cut a 45-caste angle on 1 end of the trim and agree information technology so the short end of the angle overhangs halfway, or 3/8 in., onto the jamb. Then mark the other cease flush with the within of the jamb. That'll requite y'all a 3/16-in. reveal.
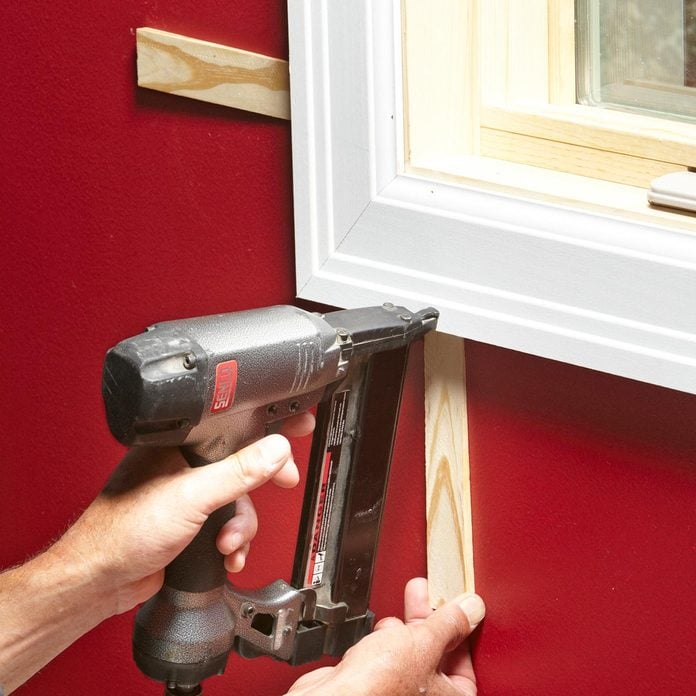
Step 2
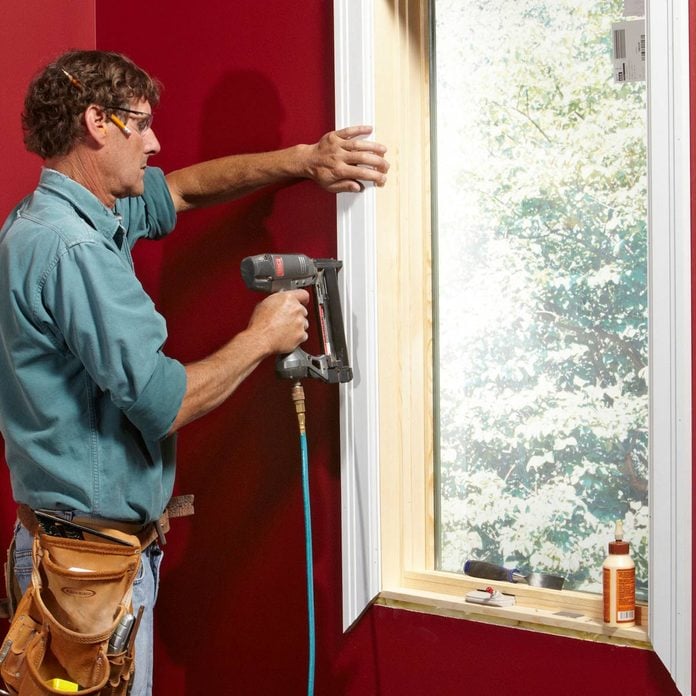
Go the Spacing Right
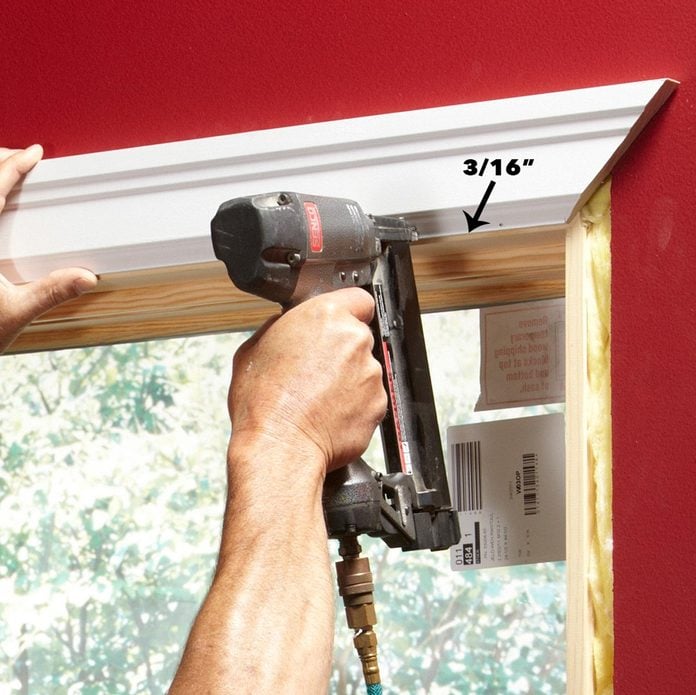
Place the top slice and hold the trim iii/16 in. abroad from the jamb at both ends and along the base of the window casing. Nail the trim to the jamb with 1-in. brads spaced nearly every 6 in. Nail the thick part of the trim to the framing with ii-in. brads.
![]()
Step three
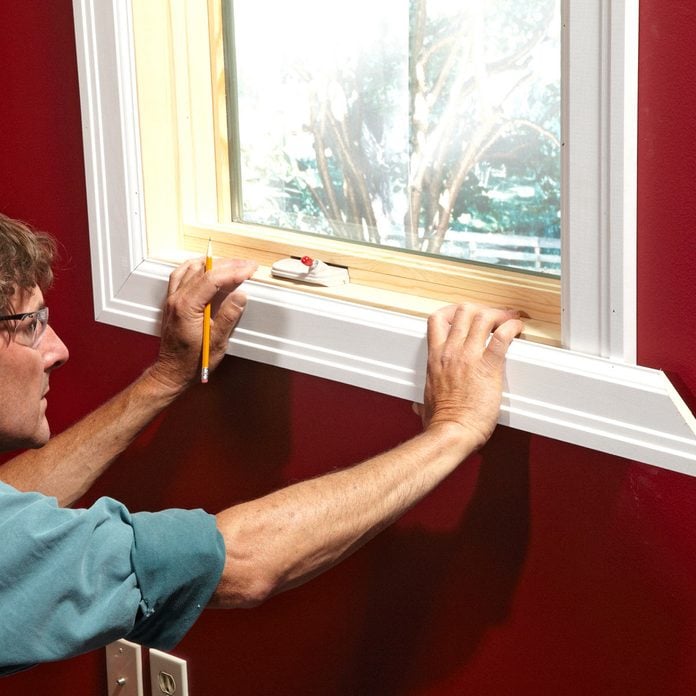
Check the Fit, then Cutting to Length
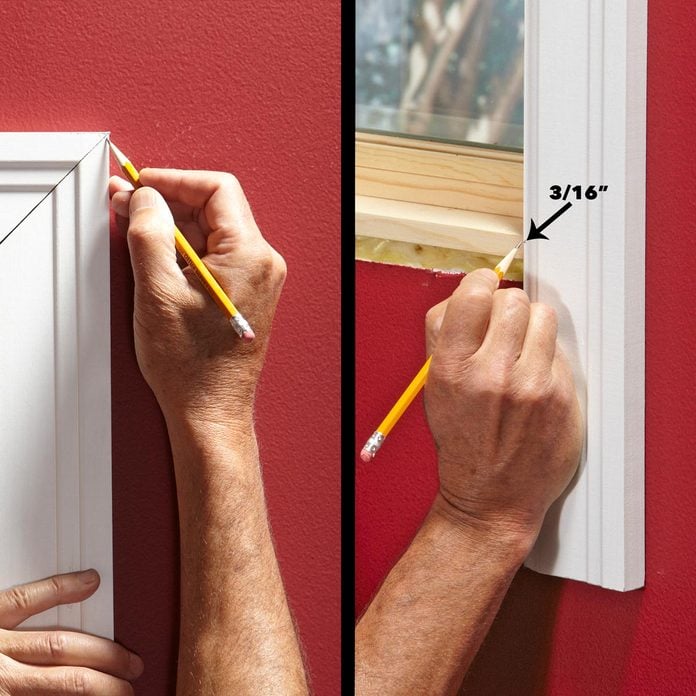
Cut a 45-degree miter on ane end of the trim board. Conform the miter every bit needed for a perfect fit. Then scribe the cutting length 3/sixteen in. past the bottom of the jamb. Nail the trim onto the jamb first and then to the window casing framing, as you did with the tiptop piece.
Step 4
Gum and Pivot for a Solid Miter
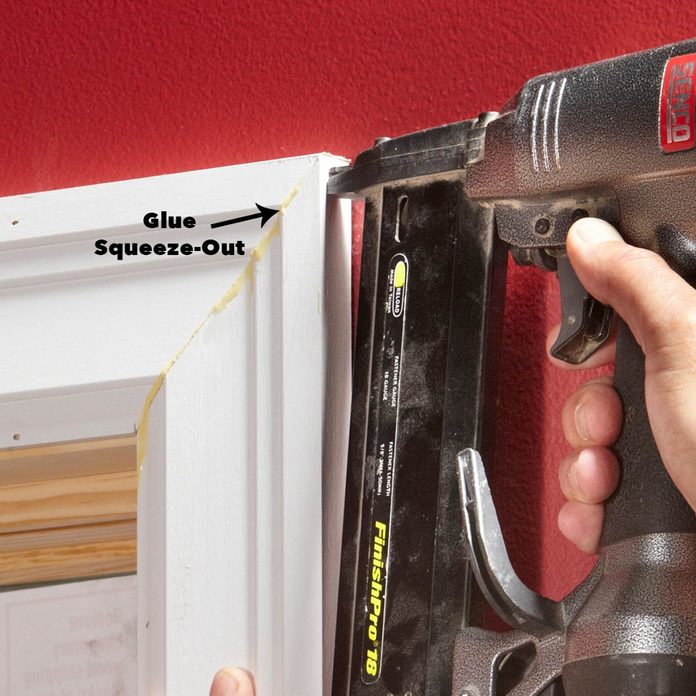
Fasten corners and glue and pin together the miter from both directions with 1-in. brads. Wipe the glue squeeze-out with a damp rag right away.
Pace 5
Trim the Other Side
Repeat all the same steps on the other side of the window, plumbing equipment offset the top miter, and so marking and cutting the bottom one. Nail the window casing trim into place.
Step 6
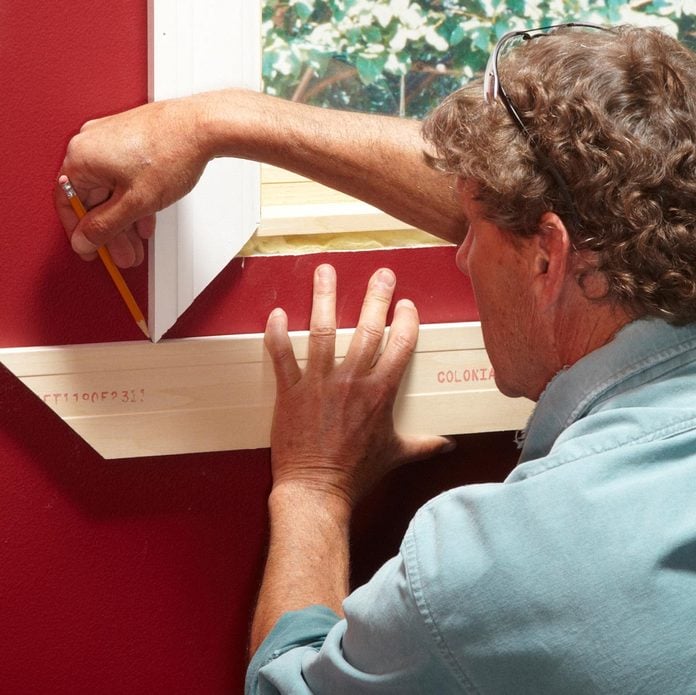
Fit the Kickoff Bottom Miter
Starting time the bottom slice. Cut an overly long slice of window casing trim and cut a miter on ane cease. Overlap the far end to check the fit. Mark and recut the miter as needed for a perfect fit.
Pace 7
Fit the Opposite Miter
Cut a test miter on the other end and check the fit. Adjust the miter equally necessary until you're satisfied with the articulation.
Step 8
Scribe for Length
Mark the final cutting. With the saw still set for the previous miter, flip the trim over and scribe the length for the cease that has that miter. Transfer the mark to the front end side and brand the cut.
Step nine
Dealing with Trouble Drywall: Projects More than i/8 in.
If the drywall projects more than 1/viii in., vanquish in the drywall with a hammer. Merely be sure the crushed surface area will be covered past trim. In this state of affairs, your miters won't be 45 degrees. You may need to go as depression as 44 degrees to get a tight miter.
Step 10
Dealing with Problem Drywall: Projects Less than 1/8 in.

If the drywall projects past the jamb 1/8 In. or less, and is close to the window jamb, just chamfer the border with a utility knife. Check to see if you've pared off plenty drywall by property a chunk of trim against the drywall and jamb. If information technology rocks and won't sit down flush against both surfaces, carve out some more.
Pace 11
Dealing with Trouble Drywall: Drywall Too Depression
If the drywall'southward recessed backside the jamb, don't blast the trim to the framing at beginning. Only blast it to the jamb and pivot the mitered corners together. After the window is trimmed, slide shims behind each nail location to concord out the trim while nailing, so cut off the shims. Caulk the perimeter of the window casing trim to eliminate gaps earlier painting.
Plus, check out how to trim a door. It'due south easier than you lot recall!
Originally Published: January ten, 2019
Source: https://www.familyhandyman.com/project/how-to-install-window-trim/
Posted by: macksorece.blogspot.com
0 Response to "How To Measure Trim For Windows"
Post a Comment